Next Generation Databases

dbtngMy latest book Next Generation Databases is now available to purchase!   You can buy it from Amazon here, or directly from Apress here.  The e-book versions are not quite ready but if you prefer the print version you’re good to go.

I wrote this book as an attempt to share what I’ve learned about non-relational databases in the last decade and position these in the context of the relational database landscape that I’ve worked in all my professional life.  

The book is divided into two sections:  the first section explains the market and technology drivers that lead to the end of complete “one size fits all” relational dominance and describes each of the major new database technologies.   These first 7 chapters are:

  • Three Database Revolutions
  • Google, Big Data, and Hadoop  
  • Sharding, Amazon, and the Birth of NoSQL
  • Document Databases
  • Tables are Not Your Friends: Graph Databases
  • Column Databases
  • The End of Disk? SSD and In-Memory Databases 

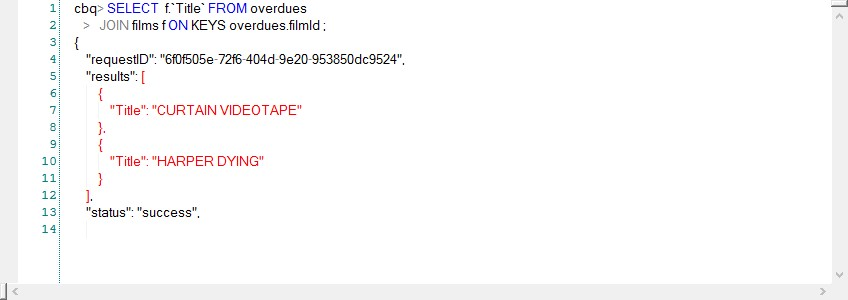
The second half of the book covers the “gory details” of the internals of the major new database technologies.  We look at how databases like MongoDB, Cassandra, HBase, Riak and others implement clustering and replication, locking and consistency management, logical and physical storage models and the languages and APIs provided.  These chapters are: 

  • Distributed Database Patterns 
  • Consistency Models 
  • Data Models and Storage 
  • Languages and Programming Interfaces

The final chapter speculates on how databases might develop in the future.  Spoiler alert: I think the explosion of new database technologies over the last few years is going to be followed by a consolidation phase, but there’s some potentially disruptive technologies on the horizon such as universal memory, blockchain and even quantum computing. 

The relational database is a triumph of software engineering and has been the basis for most of my career.  But the times they are a changing and speaking personally I’ve really enjoyed learning about these new technologies.  I learned a lot more about the internals of the newer database architectures while writing the book and I’m feeling pretty happy with the end result.   As always I’m anxious to engage with readers and find out what you guys think!

Vector clocks


Once of the concepts I found difficult initially when looking at non-relational systems is the concept of the vector clock.  Some databases – like Cassandra - use timestamps to work out which is the “latest” transaction. If there are two conflicting modifications to a column value, the one with the highest timestamp will be considered the most recent and the most correct.

Other Dynamo systems use a more complex mechanism known as a vector clock. The vector clock has the advantage of not requiring clock synchronization across all nodes, and helps us identify transactions that might be in conflict.

Despite its name, the vector clock does not include any timestamps. Rather it is composed of a set of counters. These counters are incremented when operations complete, in a similar way to the traditional System Change Number pattern that we are familiar with from relational systems like Oracle. The set contains one counter for each node in the cluster. Whenever an operation occurs on a node, that node will increment its own counter within its vector clock. Whenever a node transmits an operation to another node it will include its vector clock within the request. The transmitted vector clock will include the highest counter for the transmitting node as well is the highest counters from other nodes that the transmitting node has ever seen.

When a node receives possibly conflicting updates from other nodes, it can compare the vector clocks to determine the relative sequencing of the requests. There is a defined set of vector clock operations that can tell if:

  • The two vector clocks come from nodes that are completely in sync
  • One node is “out of date” with respect of the other node
  • The clocks are “concurrent” in that each node has some information that is more up to date than the other node. In this case we can’t choose which update is truly the more correct.

Vector clocks are notoriously difficult to understand, though the underlying algorithm is really quite simple. The diagram below shows an example of three vector clocks incrementing across three nodes. The algorithm is somewhat simplified to improve clarity

 9781484213308_Figure_09-04

In the example the vector clocks start out set to 0 for all nodes (1). Updates to nodes from external clients caused the nodes to increment their own element of the vector clock (2). When these changes are propagated to other nodes, the receiving node updates its vector clock and merges the vector clocks from the other nodes (3). Event (H) occurs when node 2 receives the vector clock (F) from node 1 and (G) from node 3 (4). Each of these vector clocks contain elements higher than the other - vector clock F has the higher value for node 1, while vector clock G has the higher value for node 3. There is no way for node 2 to be sure which of the two vector clocks represent the most up-to-date data - each of the sending nodes “knows” something that the other node does not, and consequently it’s not clear which of the two nodes “knows” best.

For those of us from the world of strictly consistent databases like Oracle, think of the vector clock as a set of System Change Numbers from each system.  We examine the SCNs from each node to see if there are nodes that might not have seen all the changes that have been recorded on another node.

The Vector clock in above us that Version G and Version F are conflicting – each contains information from unique updates that could both contain important information. What then, is the system to do? Here are some of the options:

  • Revert to last write wins: two updates are unlikely to have occurred at the exact same nanosecond, so one will have a higher timestamp value. We could decide that the highest timestamp “wins”.
  • Keep both copies, and require that the application or the user resolve the conflict.
  • Somehow merge the data. This is the approach taken by the original Dynamo which managed Amazon’s shopping cart. If there are two conflicting shopping carts they are merged and the worst that can happen (from Amazon’s point of view) is that you buy some things twice. Another merge can occur with things like counters: rather than having one counter increment overwrite another, we can deduce that both operations wanted to increment the counter and increment it twice. A special class of data types: Conflict-Free Replicated Data Type (CRDT) exist that allow these sort of merges to be predefined.

There are advocates for the vector clock – such as the architects of Riak - , and advocates for the timestamp system used in Cassandra. Neither party disagree about the concrete implications of the two approaches: they differ on the desirability of the consequences. Last Write Wins represents a simpler model for the application developer and administrator, Vector clocks allow for conflicts to be identified but which must then be resolved.   In a later post I’ll give an example of how you programmatically resolve conflicts in Riak.

Exploring CouchBase N1QL

Couchbase recently announced Non-first Normal Form Query Language (N1QL) – pronounced “Nickel” – a virtually complete SQL language implementation for use with document databases, and implemented within the Couchbase server 4.0.

I recently took a quick look. 

Most of the examples use the sample films documents shown below (this is the same sample data we created for MongoDB in this post):

2015-10-05_16-43-02 n1ql

N1QL allows us to perform basic queries to retrieve selected documents or attributes of selected documents:


N1QL allows us to access nested documents within the JSON structure using array notation. So for instance in the example below Actors[0] refers to the first nested document within the actors array:


We can query for subdocuments which match a search criteria using WHERE ANY syntax:


The UNNEST command allows embedded documents to be “joined” back to the parent document. So here we get one result for each Actor who starred in film 200, with the film title included in the results:


The UNNEST command allows us to perform the equivalent of joins between parent and children documents where the child documents are nested within the parent. N1QL also allows us to join across disparate documents, providing that one of the document collections contains a reference to the primary key in the other.

So for instance if we had a bucket of documents that contains the primary keys of “overdue” films in our imaginary (and by now definitely struggling) DVD store, then we can join that to the films collection to return just those films:


N1QL also contains DML statements allowing us to manipulate the contents of documents, and DDL statements allowing creation and modification of indexes.

N1QL is ambitious attempt to bring SQL into the world of document databases. It’s interesting to consider that as the same time that companies like CouchBase are introducing SQL support into their database, that companies like Oracle are introducing strong JSON support into their SQL-based database. It would seem that the two worlds are coming together.

Sakila sample schema in MongoDB

2018 Update:  You can download this and other sample schemas we use in dbKoda from https://medium.com/dbkoda/mongodb-sample-collections-52d6a7745908.

I wanted to do some experimenting with MongoDB, but I wasn’t really happy with any of the sample data I could find in the web.  So I decided that I would translate the MySQL “Sakila” schema into MongoDB collections as part of the learning process.   

For those that don’t know, Sakila is a MySQL sample schema that was published about 8 years ago.  It’s based on a DVD rental system.   OK, not the most modern data ever, but DVDs are still a thing aren’t they??

You can get the MongoDB version of Sakilia here.  To load, use unpack using tar zxvf sakilia.tgz then use mongoimport to load the resulting JSON documents.  On windows you should be able to double click on the file to get to the JSON.  

The Sakila database schema is shown below.  There are 16 tables representing a fairly easy to understand inventory of films, staff, customers and stores.

Database diagram

When modelling MongoDB schemas, we partially ignore our relational modelling experience – “normalization” is not the desired end state.   Instead of driving our decision on the nature of the data, we drive it on the nature of operations.  The biggest decision is which “entities” get embedded within documents, and which get linked.  I’m not the best person to articulate these principles – the O’Reilly book “MongoDB Applied Design Patterns” does a pretty good job and this presentation is also useful.

My first shot at mapping the data – which may prove to be flawed as I play with MongoDB queries – collapsed the 16 tables into just 3 documents:  FILMS, STORES and CUSTOMERS.   ACTORS became a nested document in FILMS, STAFF and INVENTORY were nested into STORES, while RENTALS and PAYMENTS nested into CUSTOMERS.   Whether these nestings turn out to be good design decisions will depend somewhat on the application.  Some operations are going to be awkward while others will be expedited.

Here’s a look at the FILMS collection:

image

Here is STORES:

image

And here is CUSTOMERS:

image

Looks like I have to fix some float rounding issues on customers.rentals.payments.amount Smile.

The code that generates the schema is here.   It’s pretty slow, mainly because of the very high number of lookups on rentals and payments.  It would be better to bulk collect everything and scan through it but it would make the code pretty ugly.   If this were Oracle I’m pretty sure I could make it run faster but with MySQL SQL tuning is much harder.

Code is pretty straight forward.  To insert a MongoDB document we get the DBCollection, then create BasicDBObjects which we insert into the DBCollection.  To nest a documnet we create a BasicDBList and insert BasicDBObjects into it.  Then we add the BasicDBList to the parent BasicDBObject.  The following snippit illustrates that sequence.  It's mostly boilerplate code, with the only human decision being the nesting structure. 

   1: DBCollection filmCollection = mongoDb.getCollection(mongoCollection);
   2:  
   3: while (fileRs.next()) { // For each film
   4:  
   5:         // Create the actors document
   6:         BasicDBObject filmDoc = new BasicDBObject();
   7:         Integer filmId = fileRs.getInt("FILM_ID");
   8:         filmDoc.put("_id", filmId);
   9:         filmDoc.put("Title", fileRs.getString("TITLE"));
  10:         // Other attributes
  11:         BasicDBList actorList = getActors(mysqlConn, filmId);
  12:         // put the actor list into the film document
  13:         filmDoc.put("Actors", actorList);
  14:         filmCollection.insert(filmDoc); // insert the film
  15:  
  16:     }

Anyway, hopefully this might be of some use to those moving from MySQL to MongoDB.  Comments welcome!

Getting started with Apache Pig

If, like me, you want to play around with data in a Hadoop cluster without having to write hundreds or thousands of lines of Java MapReduce code, you most likely will use either Hive (using the  Hive Query Language HQL) or Pig.

Hive is a SQL-like language which compiles to Java map-reduce code, while Pig is a data flow language which allows you to specify your map-reduce data pipelines using high level abstractions. 

The way I like to think of it is that writing Java MapReduce is like programming in assembler:  you need to manually construct every low level operation you want to perform.  Hive allows people familiar with SQL to extract data from Hadoop with ease and – like SQL – you specify the data you want without having to worry too much about the way in which it is retrieved.  Writing a Pig script is like writing a SQL execution plan:  you specify the exact sequence of operations you want to undertake when retrieving the data.  Pig also allows you to specify more complex data flows than is possible using HQL alone.

As a crusty old RDBMS guy, I at first thought that Hive and HQL was the most attractive solution and I still think Hive is critical to enterprise adoption of Hadoop since it opens up Hadoop to the world of enterprise Business Intelligence.  But Pig really appeals to me as someone who has spent so much time tuning SQL.  The Hive optimizer is currently at the level of early rule-based RDBMS optimizers from the early 90s.  It will get better and get better quickly, but given the massive size of most Hadoop clusters, the cost of a poorly optimized HQL statement is really high.  Explicitly specifying the execution plan in Pig arguably gives the programmer more control and lessens the likelihood of the “HQL statement from Hell” brining a cluster to it’s knees.

So I’ve started learning Pig, using the familiar (to me) Oracle sample schema which I downloaded using SQOOP.   (Hint:  Pig likes tab separated  files, so use the --fields-terminated-by '\t' flag in your SQOOP job). 

Here’s a diagram I created showing how some of the more familiar HQL idioms are implemented in Pig:

Note how using Pig we explicitly control the execution plan:  In HQL it’s up to the optimizer whether tables are joined before or after the “country_region=’Asia’” filter is applied.  In Pig I explicitly execute the filter before the join.    It turns out that the Hive optimizer does the same thing, but for complex data flows being able to explicitly control the sequence of events can be an advantage. 

Pig is only a little more wordy than HQL and while I definitely like the familiar syntax of HQL I really like the additional control of Pig.

Oracle tables vs Cassandra SuperColumns


In my last post,  I wrote some Java code to insert Oracle tables into Cassandra column families.  As much fun as this was for me, it was  fairly trivial and not a particularly useful exercise in terms of learning Cassandra. 

In Cassandra,  data modelling is very different from the relational models we are used to and one would rarely convert a complete Oracle schema from tables directly to ColumnFamilies .  Instead, Cassandra data modelling involves the creation of ColumnFamilies with SuperColumns to represent master-detail structures that are commonly referenced together

SuperColumns vs Relational schema


At the Cassandra Summit in August,  Eben Hewitt gave a presentation on Cassandra Data Modelling.   There’s a lot of nuance in that talk and in the topic, but a key point in Cassandra – as in many other NoSQL databases – is that you model data to match the queries you need to satisfy,  rather than to a more theoretically "pure" normalized form.   For relational guys, the process is most similar to radical denormalization in which you introduce redundancy to allow for efficient query processing.

For example, let’s consider the Oracle SH sample schema.  Amongst other things, it includes SALES, PRODUCTS and CUSTOMERS:


9-09-2010 3-35-32 PM Oracle sample schema

We could map each Oracle table to a Cassandra ColumnFamily, but because there are no foreign key indexes or joins,  such a Cassandra data model would not necessarily support the types of queries we want.  For instance, if we want to query sales totals by customer ID, we should create a column family keyed by customer id, which contains SuperColumns named for each product which in turn includes columns for sales totals.  It might look something like this:

ID CustomerDetails Product Name #1 Product Name #2 ………….. Product Name #N
1
First Name Last Name
Guy Harrison
Quantity Value
3 $100,020
  …………..
Quantity Value
3 $130,000
2
First Name Last Name
Greg Cottman
 
Quantity Value
34 $10,080
…………..
Quantity Value
4 $99,000


Each customer “row” has super column for each product that contains the sales for that product.  Not all customers have all the supercolumns - each customer has supercolumns only for each product they have purchased.  The name of the SuperColumn is the name of the product.  

Giving the column the name of the product is a major departure from how we would do things in Oracle.  The name of a column or SuperColumn can be determined by the data, not by the schema - a concept completely alien to relational modelling.

Inserting into SuperColumns with Hector


To try and understand this,  I created a Cassandra columnfamily of the type “Super”.  Here’s my definition in the storage-conf.xml file:

<ColumnFamily Name="SalesByCustomer" 
ColumnType="Super"
CompareWith="UTF8Type"
CompareSubcolumnsWith="UTF8Type"
Comment="Sales summary for each customer "/>

And here is some of my Hector Java program, which reads sales totals for each customer from the Oracle sample schema, and inserts them into the ColumnFamily:

   1: private static void insertSales(Connection oracleConn, Keyspace keyspace,
   2:         String cfName) throws SQLException {
   3:     int rows = 0;
   4:     ColumnPath cf = new ColumnPath(cfName);
   5:     Statement query = oracleConn.createStatement();
   6:  
   7:     String sqlText = "SELECT cust_id, cust_first_name,  cust_last_name, prod_name, "
   8:             + "           SUM (amount_sold) sum_amount_sold,sum(quantity_sold) sum_quantity_sold "
   9:             + "          FROM sh.sales    "
  10:             + "          JOIN sh.customers USING (cust_id) "
  11:             + "          JOIN sh.products  USING (prod_id)  "
  12:             + "         GROUP BY cust_id, cust_first_name,  cust_last_name,  prod_name "
  13:             + "         ORDER BY cust_id, prod_name ";
  14:     ResultSet results = query.executeQuery(sqlText);
  15:     int rowCount = 0;
  16:     int lastCustId = -1;
  17:     while (results.next()) { // For each customer
  18:         Integer custId = results.getInt("CUST_ID");
  19:         String keyValue = custId.toString();
  20:  
  21:         if (rowCount++ == 0 || custId != lastCustId) { // New Customer
  22:             String custFirstName = results.getString("CUST_FIRST_NAME");
  23:             String custLastName = results.getString("CUST_LAST_NAME");
  24:             System.out.printf("%s %s\n", custFirstName, custLastName);
  25:             //Create a supercolumn for customer details (first, lastname)     
  26:             cf.setSuper_column(StringUtils.bytes("CustomerDetails"));
  27:             cf.setColumn(StringUtils.bytes("customerFirstName"));
  28:             keyspace.insert(keyValue, cf, StringUtils.bytes(custFirstName));
  29:             cf.setColumn(StringUtils.bytes("customerLastName"));
  30:             keyspace.insert(keyValue, cf, StringUtils.bytes(custLastName));
  31:         }
  32:         //Insert product sales total for that customer 
  33:         String prodName = results.getString("PROD_NAME");
  34:         Float SumAmountSold = results.getFloat("SUM_AMOUNT_SOLD");
  35:         Float SumQuantitySold = results.getFloat("SUM_QUANTITY_SOLD");
  36:         //Supercolumn name is the product name 
  37:         cf.setSuper_column(StringUtils.bytes(prodName));
  38:         cf.setColumn(StringUtils.bytes("AmountSold"));
  39:         keyspace.insert(keyValue, cf, StringUtils.bytes(SumAmountSold.toString()));
  40:         cf.setColumn(StringUtils.bytes("QuantitySold"));
  41:         keyspace.insert(keyValue, cf, StringUtils.bytes(SumQuantitySold.toString()));
  42:         
  43:         lastCustId = custId;
  44:         rows++;
  45:     }
  46:     System.out.println(rows + " rows loaded into " + cf.getColumn_family());
  47: }

This code is fairly straightforward,  but let’s step through it anyway:

Lines Description
7-14 Execute the Oracle SQL to get product summaries for each customer
17 Loop through each row returned (one row per product per customer)
21 Check to see if this is a completely new customer
26-30 If it is a new customer,  create the CustomerDetails SuperColumn for that customer.  The SuperColumn name is “CustomerDetails” and it contains columns for Firstname and Lastname.
37-41

Now we create a SuperColumn for a specfic product, still keyed to the customer.  The SuperColumn name is set to the name of the product (line 37).  Inside the supercolumn are placed columns “AmountSold” (lines 38-39) and “QuantitySold” (lines 40-41)


Querying SuperColumns


Inserting master detail relationships into a supercolumn column family was easy enough.  I had a lot more difficulty writing code to query the data.  The tricky part seems to be when you don’t know the name of the SuperColumn you want to read from.  There's no direct equivalent to the JDBC ResultMetaData object to query the SuperColumn names - instead you create a "SuperSlice" predictate that defines a range of SuperColumns that you want to retrieve.  It's a bit awkward to express the simple case in which you want to return all the SuperColumns. 

Below is a bit of code which retrieves sales totals for a specific customer id.  I suspect I've made a few newbie mistakes :-):

   1: public static void querySuperColumn(Keyspace keyspace, String cfName,
   2:         String keyValue) {
   3:  
   4:     ColumnPath colFamily = new ColumnPath(cfName);
   5:     System.out.println("Details for customer id " + keyValue);
   6:  
   7:     /* Get Customer Details */
   8:     colFamily.setSuper_column(StringUtils.bytes("CustomerDetails"));
   9:     SuperColumn custDetailsSc = keyspace
  10:             .getSuperColumn(keyValue, colFamily);
  11:     for (Column col : custDetailsSc.getColumns()) {
  12:         String colName = StringUtils.string(col.getName()); 
  13:         String colValue = StringUtils.string(col.getValue()); 
  14:         System.out.printf("\t%-20s:%-20s\n", colName, colValue);
  15:     }
  16:     /* Get dynamic columns -  */
  17:     ColumnParent colParent = new ColumnParent(cfName);
  18:     SliceRange sliceRange = new SliceRange(StringUtils.bytes(""), StringUtils
  19:             .bytes(""), false, 2 ^ 32); // TODO: what if there are > 2^32 ??                                             
  20:     SlicePredicate slicePredicate = new SlicePredicate();
  21:     slicePredicate.setSlice_range(sliceRange);
  22:     //TODO:  Surely there's an easier way to select all SC than the above??
  23:     List superSlice = keyspace.getSuperSlice(keyValue,
  24:             colParent, slicePredicate);
  25:     for (SuperColumn prodSuperCol : superSlice) {  //For each super column
  26:         String superColName = StringUtils.string(prodSuperCol.getName());
  27:         if (!superColName.equals("CustomerDetails")) { // Already displayed
  28:                                                          
  29:             System.out.printf("\n%50s:", superColName); // product Name 
  30:             List columns1 = prodSuperCol.getColumns();
  31:             for (Column col : columns1) {               // product data 
  32:                 String colName = StringUtils.string(col.getName()); 
  33:                 String colValue = StringUtils.string(col.getValue()); 
  34:                 System.out.printf("\t%20s:%-20s", colName, colValue);
  35:  
  36:             }
  37:         }
  38:     }
  39:  
  40: }
Lines Description
8-9 Set the superColumn to the “CustomerDetails” supercolumn
11-14 Retrieve the column values (firstname, surname) for the CustomerDetails supercolumn
17-21 Set up a “SlicePredicate” that defines the supercolumns to be queried.  I want to get all of the supercolumns (eg every product), so I set up an unbounded range (line 18) and supply that to the slice predicate (line 21)
23 Create a list of supercolumns.  This will include all the SuperColumns in the column family (including, unfortunately,  CustomerDetails)
27 Eliminate CustomerDetails from the result.  Here we only want product names
30-35 Iterate through the columns in each supercolumn.  THis will extract QuantitySold and AmountSold for each Product name


Here’s some output from the Java program.  It prints out customer Details and product sales totals for customer# 10100:

Details for customer id 101000
customerFirstName :Aidan
customerLastName :Wilbur

CD-RW, High Speed Pack of 5: AmountSold:11.99 QuantitySold:1.0
Keyboard Wrist Rest: AmountSold:11.99 QuantitySold:1.0
Multimedia speakers- 3" cones: AmountSold:44.99 QuantitySold:1.0


SuperColumns with Toad for Cloud Databases 


Toad for cloud databases now has Cassandra support, which makes querying SuperColumns s a lot easier.  SuperColumns that have dynamic names but uniform internal column structure (as in my example above) are represented by Toad for Cloud Databases as a detail table.  To put it another way,  Toad for Cloud Databases re-normalizes the data - displaying it in the format that we would typically use in an RDBMS. 

So when we point Toad for Cloud databases at our SalesByCustomer column family, it maps the column family to two tables:  one for CustomerDetails and the other - which by default it will call SalesByCustomersuper_column” – for product sales totals.  We can rename the subtable and subtable key during the mapping phase to make it clearer that it represents product details.

9-09-2010 1-56-19 PM map cassandra super col

Now if we want to extract product details for a particular customer, we can do a SQL join.  Below we build the join in the query builder, but of course we could simply code the SQL by hand as we would for any NoSQL or SQL database supported by Toad for Cloud Databases:

9-09-2010 3-49-36 PM cassandra supercol qry

And just to close the loop, here we can see that the Toad for Cloud databases query returns the same data as the Hector query:

9-09-2010 3-50-48 PM cassabdra supercol results


Conclusion


All NoSQL databases require that we change the way we think about data modelling, and Cassandra is no exception.  SuperColumns are an incredibly powerful construct, but I can’t say that I found them intuitive or easy.  Hopefully APIs and tooling will evolve to make life easier for those of us coming from the relational world.

Playing with Cassandra and Oracle

Cassandra  is one of the hottest of the NoSQL databases.  From a production DBAs perspective it’s not hard to see why:  while some of the other NoSQLs offer more programming bells and whistles for the developer, Cassandra is built from the ground up for total and transparency redundancy and scalability, close to the heart of every DBA.

However,  Cassandra involves some complex data modelling concepts – mainly around the notorious SuperColumn concept, and I don’t think I’ll ever understand it fully until I’ve played directly with some data.  To that end, I thought I’d start by trying to model some familiar Oracle sample schemas in Cassandra.

Toad for Cloud Databases is releasing support for Cassandra early next month (eg September 2010), so I’ve been using that – as well as Java of course – to try to get some initial data loaded.

For other NoSQL databases,  Toad for Cloud lets us create NoSQL tables from relational tables with a couple of clicks.  Unfortunately, we can’t do that with Cassandra, since you can’t create a ColumnFamily on the fly.  So my first Cassandra tasks was to write a simple program to take an Oracle table (or query) and create a matching column family.

Getting started

Getting started with Cassandra was surprisingly easy.  I followed the instructions in http://schabby.de/cassandra-installation-configuration/ to install Cassandra on my laptop, and installed the hector Java interface from http://prettyprint.me/2010/02/23/hector-a-java-cassandra-client/.

Terminology in NoSQL can be confusing, with each NoSQL database using terms differently from each other, and all of them using terms differently from RDBMS.  In Cassandra:

  • A Keyspace is like a schema
  • ColumnFamily is roughly like a table

Things get very funky when SuperColumns are introduced, but lets skip that for now.

To create a ColumnFamily in Cassandra 0.6, we have to add its name to the storage-conf.xml file which is in the Conf directory and then restart Cassandra.  In 0.7 there’ll be a way to do this without restarting the server.

Here is where I created a keyspace called “Guy” and created some ColumnFamilies to play with:

   1: "Guy">
   2:   "G_Employees" CompareWith="UTF8Type"/>
   3:   "G_Employees2" CompareWith="UTF8Type"/>
   4:   "G_Employees3" CompareWith="UTF8Type"/>
   5:   org.apache.cassandra.locator.RackUnawareStrategy
   6:   1
   7:   org.apache.cassandra.locator.EndPointSnitch
   8: 


Loading data


I wrote some Java code that takes a SQL statement, and loads the result set directly into a column family.  Here’s the critical method (the complete java program with command line interface is here):

   1: private static void oracle2Cassandra(Connection oracleConn,
   2:         Keyspace keyspace, String cfName, String sqlText)
   3:         throws SQLException {
   4:     int rows = 0;
   5:     ColumnPath cf = new ColumnPath(cfName);
   6:     Statement oraQuery = oracleConn.createStatement();
   7:     ResultSet result = oraQuery.executeQuery(sqlText);
   8:     ResultSetMetaData rsmd = result.getMetaData();
   9:     while (result.next()) { // For each row in the output
  10:         // The first column in the result set must be the key value
  11:         String keyValue = result.getString(1);
  12:         // Iterate through the other columns in the result set
  13:         for (int colId = 2; colId <= rsmd.getColumnCount(); colId++) {
  14:             String columnName = rsmd.getColumnName(colId);
  15:             String columnValue = result.getString(colId);
  16:             if (!result.wasNull()) {
  17:             cf.setColumn(StringUtils.bytes(columnName));
  18:                 keyspace.insert(keyValue, cf, StringUtils
  19:                         .bytes(columnValue));
  20:             }
  21:         }
  22:         rows++;
  23:     }
  24:     System.out.println(rows + " rows loaded into " + cf.getColumn_family());
  25: }

The method take s a Oracle connection and a SQL statement, and pushes the data from that SQL into the Cassandra column family and keyspace specified.   The first column returned by the query is used on the key to the Cassandra data.

Lines 6-8 execute the statement and retrieve a ResultSet object – which contains the data – and a ResultSetMetaData object which contains the column names.  Lines 9-21 just iterate through the rows and columns and create entries in the Column Family that match.   We use the Hector setColumn methodto set the name of the column and the insert method to apply the column value.  Too easy!

Of course, I’d have no idea as to whether my job had worked if I didn’t have Toad for Cloud databases available.  Using TCD, I can map the Cassandra columnFamily to a TCD “table” and browse the table (eg Cassandra Column Family) to see the resulting data:

image

I can even use SQL to join the Cassandra data to the Oracle data to make absolutely certain that the data transfer went OK:

image


It’s surprisingly easy to get started with Cassandra.  Installation of a test cluster is a breeze, and the Hector Java API is straight forward.    Of course,  direct mapping of RDBMS tables to Cassandra ColumnFamilies doesn’t involve the complexities of advanced Cassandra data models using variable columns and SuperColumns.    Next, I’m going to try and map a more complex ColumnFamily which maps to multiple Oracle tables – hopefully won’t make my brain hurt too much!

Toad for Cloud Databases is introducing Cassandra support in the 1.1 release due out within the next two weeks.  Its a free download from toadforcloud.com

Consistency models in Non relational Databases

One of the most significant differences between the new generation of non-relational (AKA NoSQL) databases and the traditional RDBMS is the way in which consistency of data is handled.  In a traditional RDBMS, all users see a consistent view of the data.  Once a user commits a transaction, all subsequent queries will report that transaction and certainly no-one will see partial results of a transaction.

RDBMS transactions are typically described as “ACID” transactions.  That is, they are:

  • Atomic: The transaction is indivisible – either all the statements in the transaction are applied to the database, or none are.
  • Consistent: The database remains in a consistent state before and after transaction execution.
  • Isolated: While multiple transactions can be executed by one or more users simultaneously, one transaction should not see the effects of other concurrent transactions.
  • Durable: Once a transaction is saved to the database (an action referred to in database programming circles as a commit), its changes are expected to persist.

As databases become distributed across multiple hosts,  maintaining ACID consistency becomes increasingly difficult.  In a transaction that spans multiple independent databases, complex two-phase commit protocols must be employed.  In the case of a truly clustered distributed database even more complex protocols are required, since the state of data in memory and the state of data in various transaction logs and data files must be maintained in a consistent state (cache fusion in Oracle RAC for instance).

CAP Theorem:  You can’t have it all


In 2000,  Eric Brewer outlined the CAP (AKA Brewer’s) Theorem.   Simplistically,  CAP theorem says that in a distributed database system, you can only have at most two of the following three characteristics:

  • Consistency: All nodes in the cluster see exactly the same data at any point in time
  • Availability: Failure of a node does not render the database inoperative
  • Partition tolerance:  Nodes can still function when communication with other groups of nodes is lost

Text Box-Quest Blue

Interpretation and implementations of CAP theorem vary,  but most of the NoSQL database system architectures favour partition tolerance and availability over strong consistency.

Eventual Consistency


A compromise between eventual consistency and weak (no guarantees) consistency is Eventual Consistency.

The core of the eventual consistency concept is that although the database may have some inconsistencies at a point in time, it will eventually become consistent should all updates cease.  That is,  inconsistencies are transitory:  eventually all nodes will receive the latest consistent updates.

BASE – Basically Available Soft-state Eventually consistent is an acronym used to contrast this approach with the RDBMS ACID transactions described above.

Not all implementations of eventually consistent are equal.     In particular, an eventually consistent database may also elect to provide the following:

  • Causal consistency:  This involves a signal being sent from between application sessions indicating that a change has occurred.  From that point on the receiving session will always see the updated value.
  • Read your own writes:  In this mode of consistency, a session that performs a change to the database will immediately see that change, even if other sessions experience a delay.
  • Monotonic consistency:  In this mode, A session will never see data revert to an earlier point in time.   Once we read a value, we will never see an earlier value.   


The NRW notation

NRW notation describes at a high level how a distributed database will trade off consistency, read performance and write performance.  NRW stands for:

  • N: the number of copies of each data item that the database will maintain. 
  • R: the number of copies that the application will access when reading the data item 
  • W: the number of copies of the data item that must be written before the write can complete.  

When N=W then the database will always write every copy before returning control to the client – this is more or less what traditional databases do when implementing synchronous replication.   If you are more concerned about write performance than read performance, then you can set W=1, R=N.  Then each read must access all copies to determine which is correct, but each write only has to touch a single copy of the data.

Most NoSQL databases use N>W>1:  more than one write must complete, but not all nodes need to be updated immediately.   You can increase the level of consistency in roughly three stages:

  1. If R=1, then the database will accept whatever value it reads first.  This might be out of date if not all updates have propagated through the system.   
  2. If R>1 then the database will more than one value and pick either the most recent (or “correct”) value.
  3. If W+R>N, then a read will always retrieve the latest value,  although it may be mixed in with “older” values.  In other words, the number of copies you write and the number of copies you read is high enough to guarantee that you’ll always have at least one copy of the latest version in your read set.   This is sometimes referred to as quorum assembly. 
     
NRW configuration Outcome
W=N  R=1 Read optimized strong consistency
W=1 R=N Write optimized strong consistency
W+R<=N Weak eventual consistency.  A read might not see latest update
W+R>N Strong consistency through quorum assembly.  A read will see at least one copy of the most recent update


NoSQL databases generally try hard to be as consistent as possible, even when configured for weaker consistency.  For instance, the read repair algorithm is often implemented to improve consistency when R=1.  Although the application does not wait for all the copies of a data item to be read,  the database will read all known copies in the background after responding to the initial request.  If the application asks for the data item again, it will therefore see the latest version. 

Vector clocks

NoSQL databases can seem simplistic in some respects, but there’s a lot of really clever algorithms going on behind the scenes.   For example,  the vector clock algorithm can be used to ensure that updates are processed in order (monotonic consistency).

With vector clocks,  each node participating in the cluster maintains an change number (or event count) similar to the System Change Number used in some RDBMSs.  The “vector” is a list including the current node's change number as well as the change numbers that have been received from other nodes.  When an update is transmitted, the vector is included with the update and the receiving node compares that vector with other vectors that have been received to determine if updates are being received out of sequence.    Out of sequence updates can be held until the preceding updates appear.

I found vector clocks hard to understand until I read the description in Operating Systems: Concurrent and Distributed Software Design  by Jean Bacon and Tim Harris (Addison-Wesley).

Amazon’s Dynamo

A lot of the eeventually consistent concepts were best articulated by Amazon in Verner Vogels’ Eventually Consistent paper and in Amazon’s paper on the Dynamo eeventually consistent key-value store.   Dynamo implements most of the ideas above, and is the inspiration for several well known NoSQL datastores including Voldemort and – together with Google’s BigTable specification – Cassandra.